Etherscan: Manual Operations
Introduction
Just like any other open protocol, Sablier V2 can be interacted with directly through a blockchain explorer like Etherscan.
In this guide, we will show you how to create a stream and withdraw from a stream by manually interacting with the Sablier V2 Core contracts on Etherscan.
If you're interested in interacting with V1, please refer to this article.
Creating a Stream
Prerequisites
Before being able to create a stream using the Sablier V2 Core contracts you need to have granted a sufficient token allowance. See the Allowances section below for a guide on how to do that.
Step 1: Go to contract page
Head over to our deployments list to pick the contract address you want to interact with.
For each chain, that will be either SablierV2LockupLinear, SablierV2LockupDynamic, or SablierV2LockupTranched. In
this tutorial, we will create a LockupLinear stream on Sepolia.
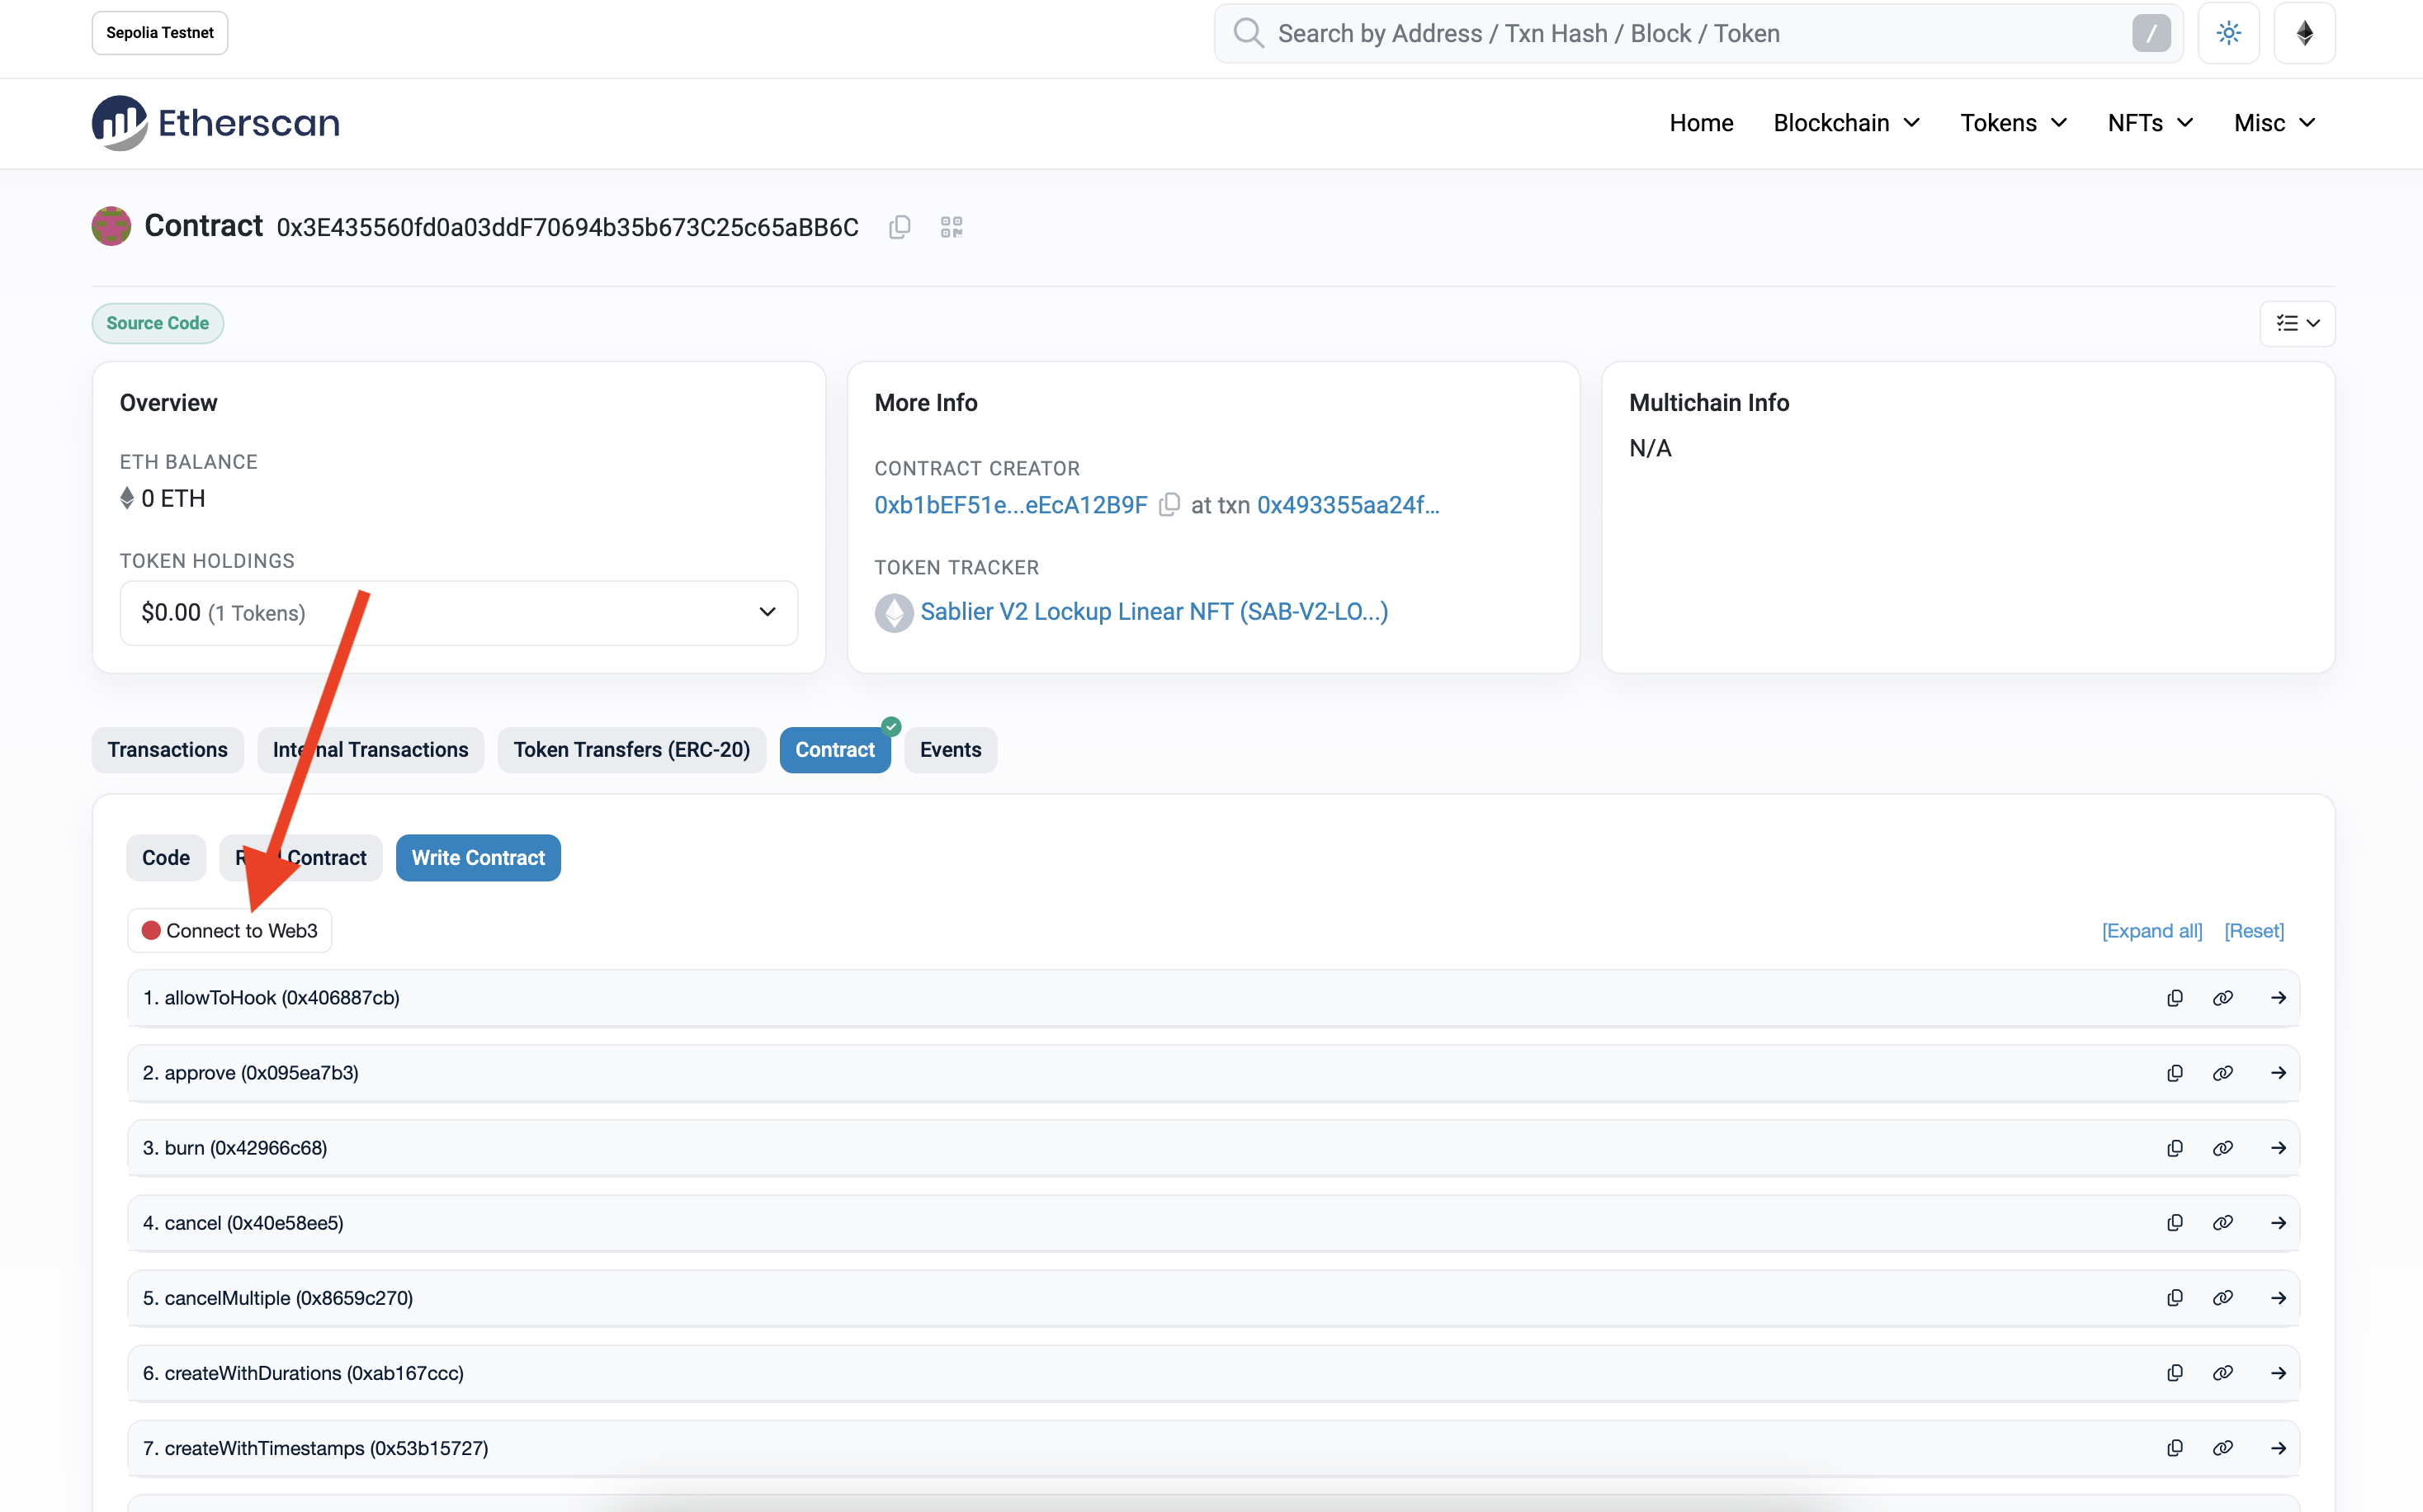
Once you find the right contract, click on the address to access its explorer's page. Click on the "Contract" tab, and then on the "Write Contract" sub-tab.
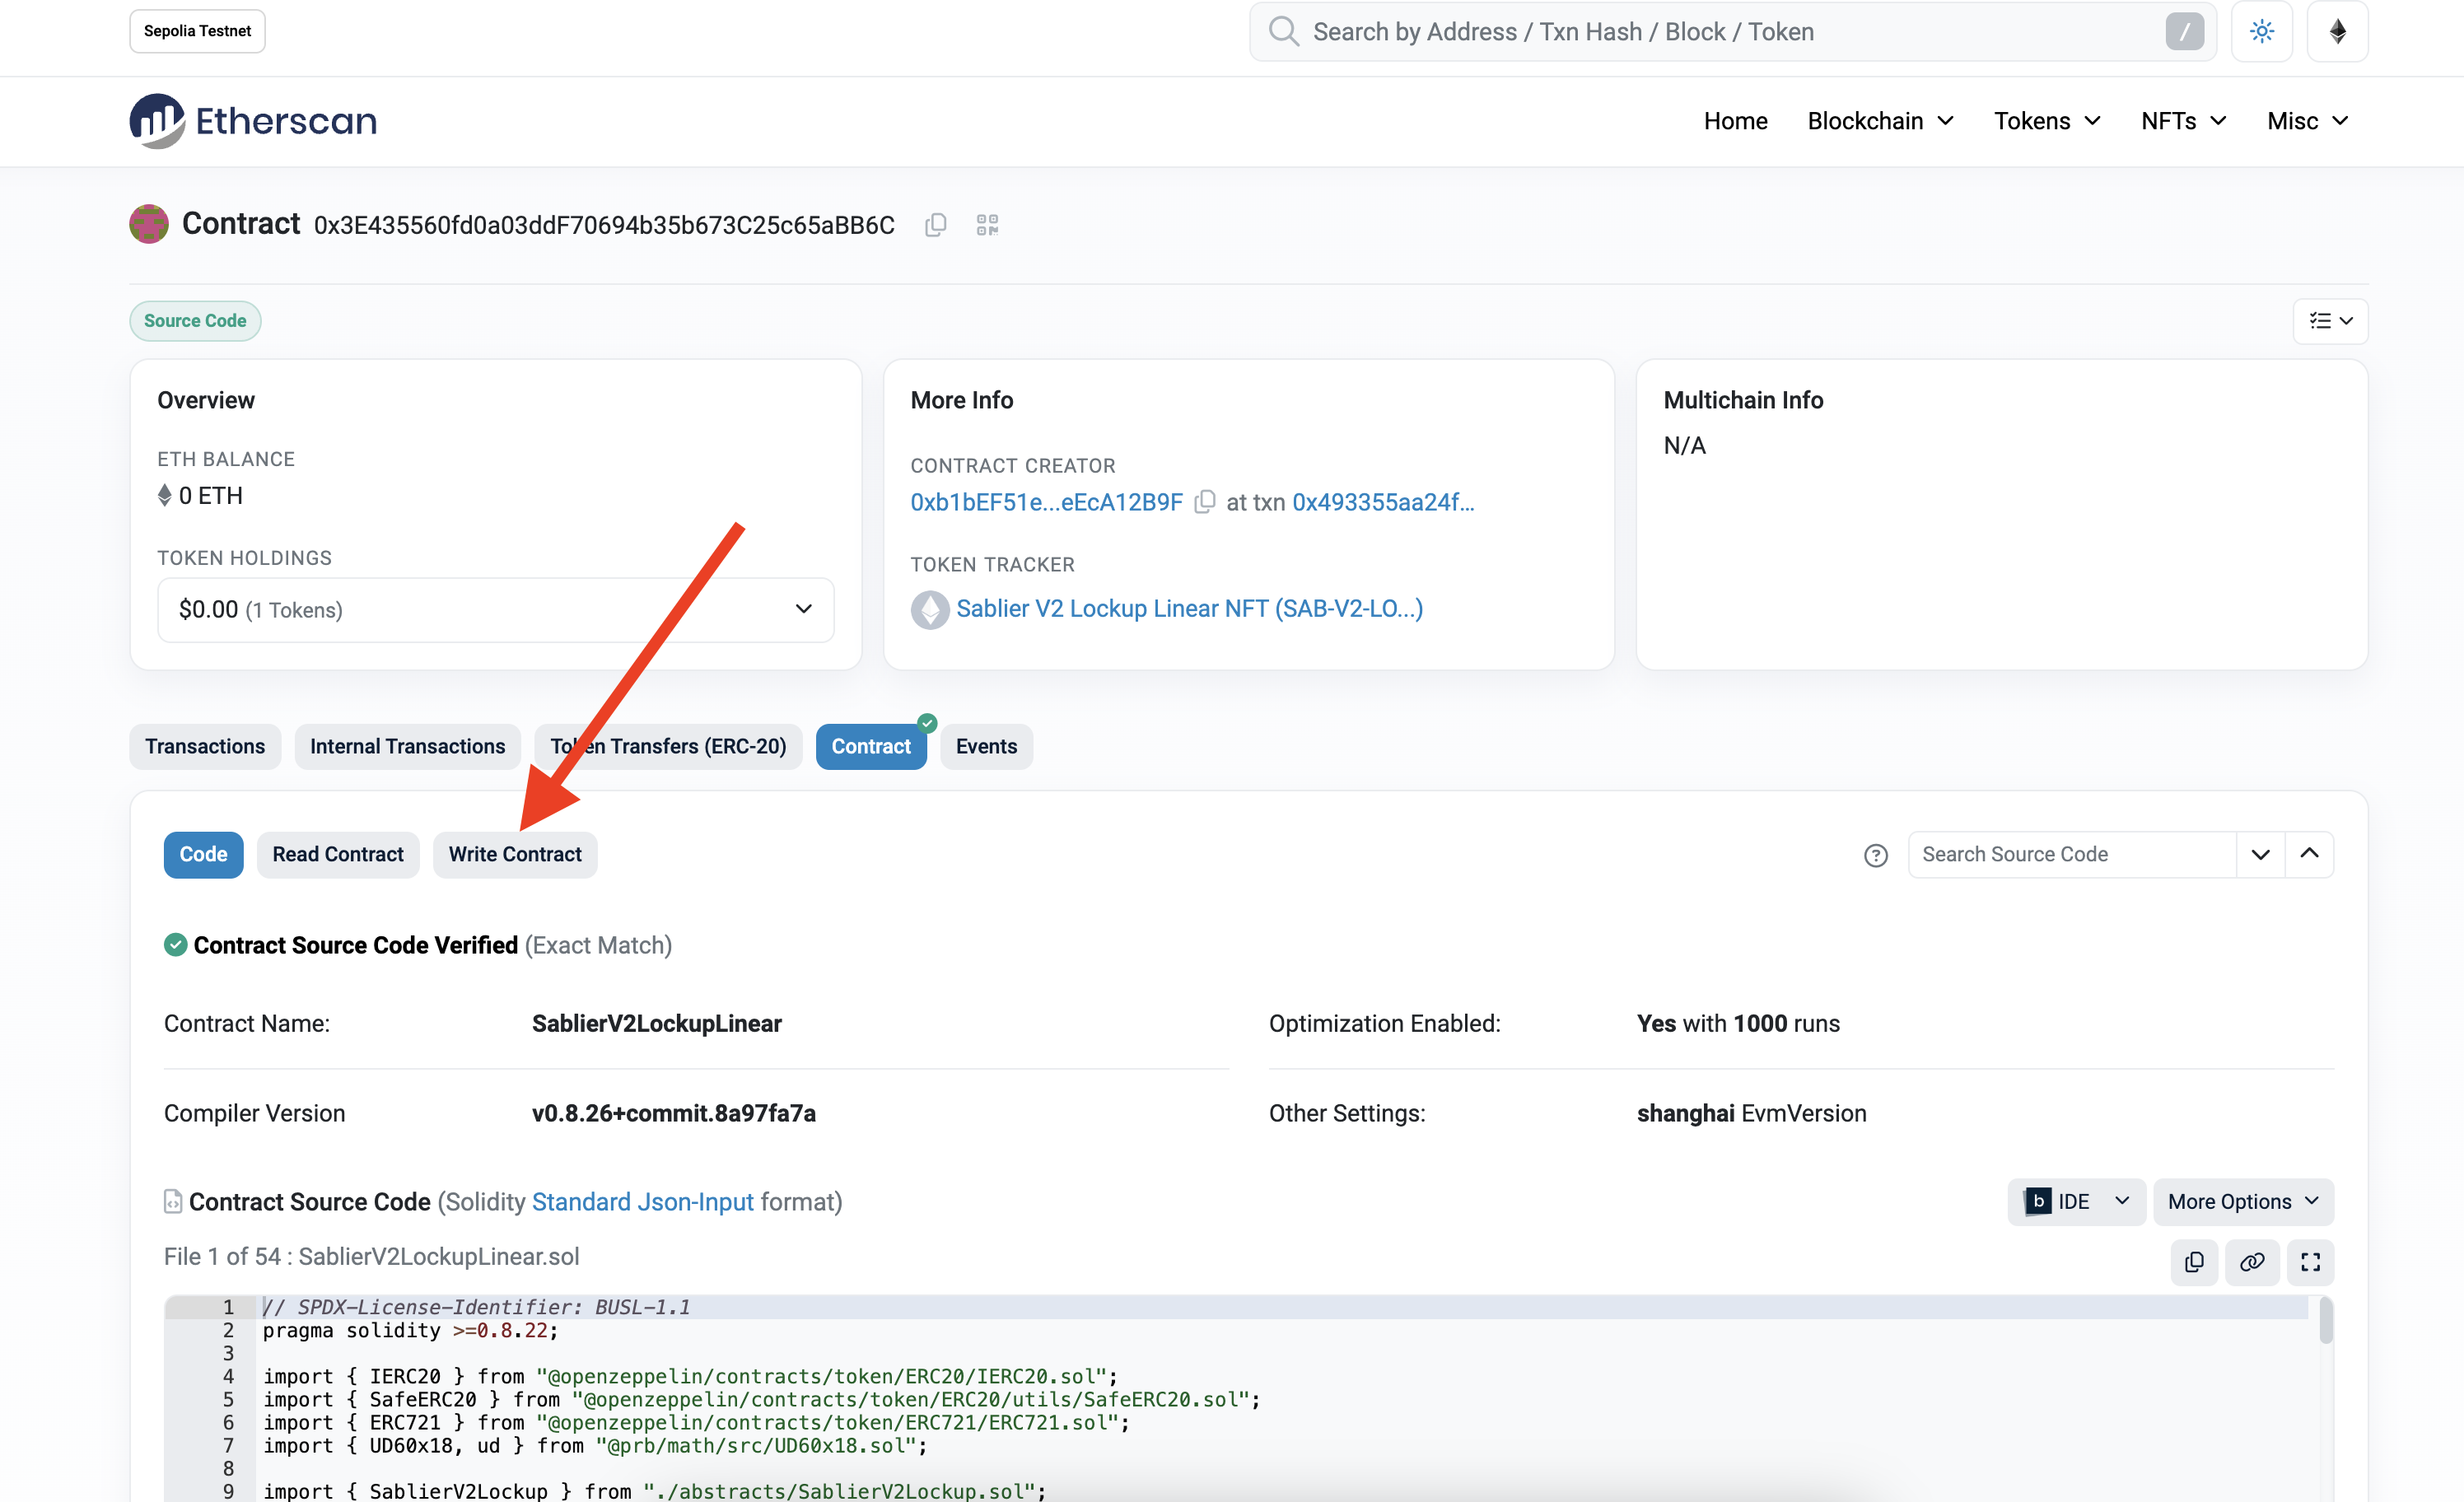
You can now connect your wallet to the interface by clicking on "Connect to Web3".
Step 2: Fill in parameters
We will now proceed to create our first stream. Let's go with the following parameters:
- a
LockupLinearstream - and a deposit of 20,000 DAI
- starting Jan 1, 2025
- ending Jan 1, 2026
- with no cliff
- non-cancelable
- and transferrable
As the start and end date are fixed, we'll be using the
createWithTimestamps
method. Please note that using
createWithDurations is
also possible if you specify durations instead of the timestamps.
Open the "createWithTimestamps" method, and start filling in the stream details:
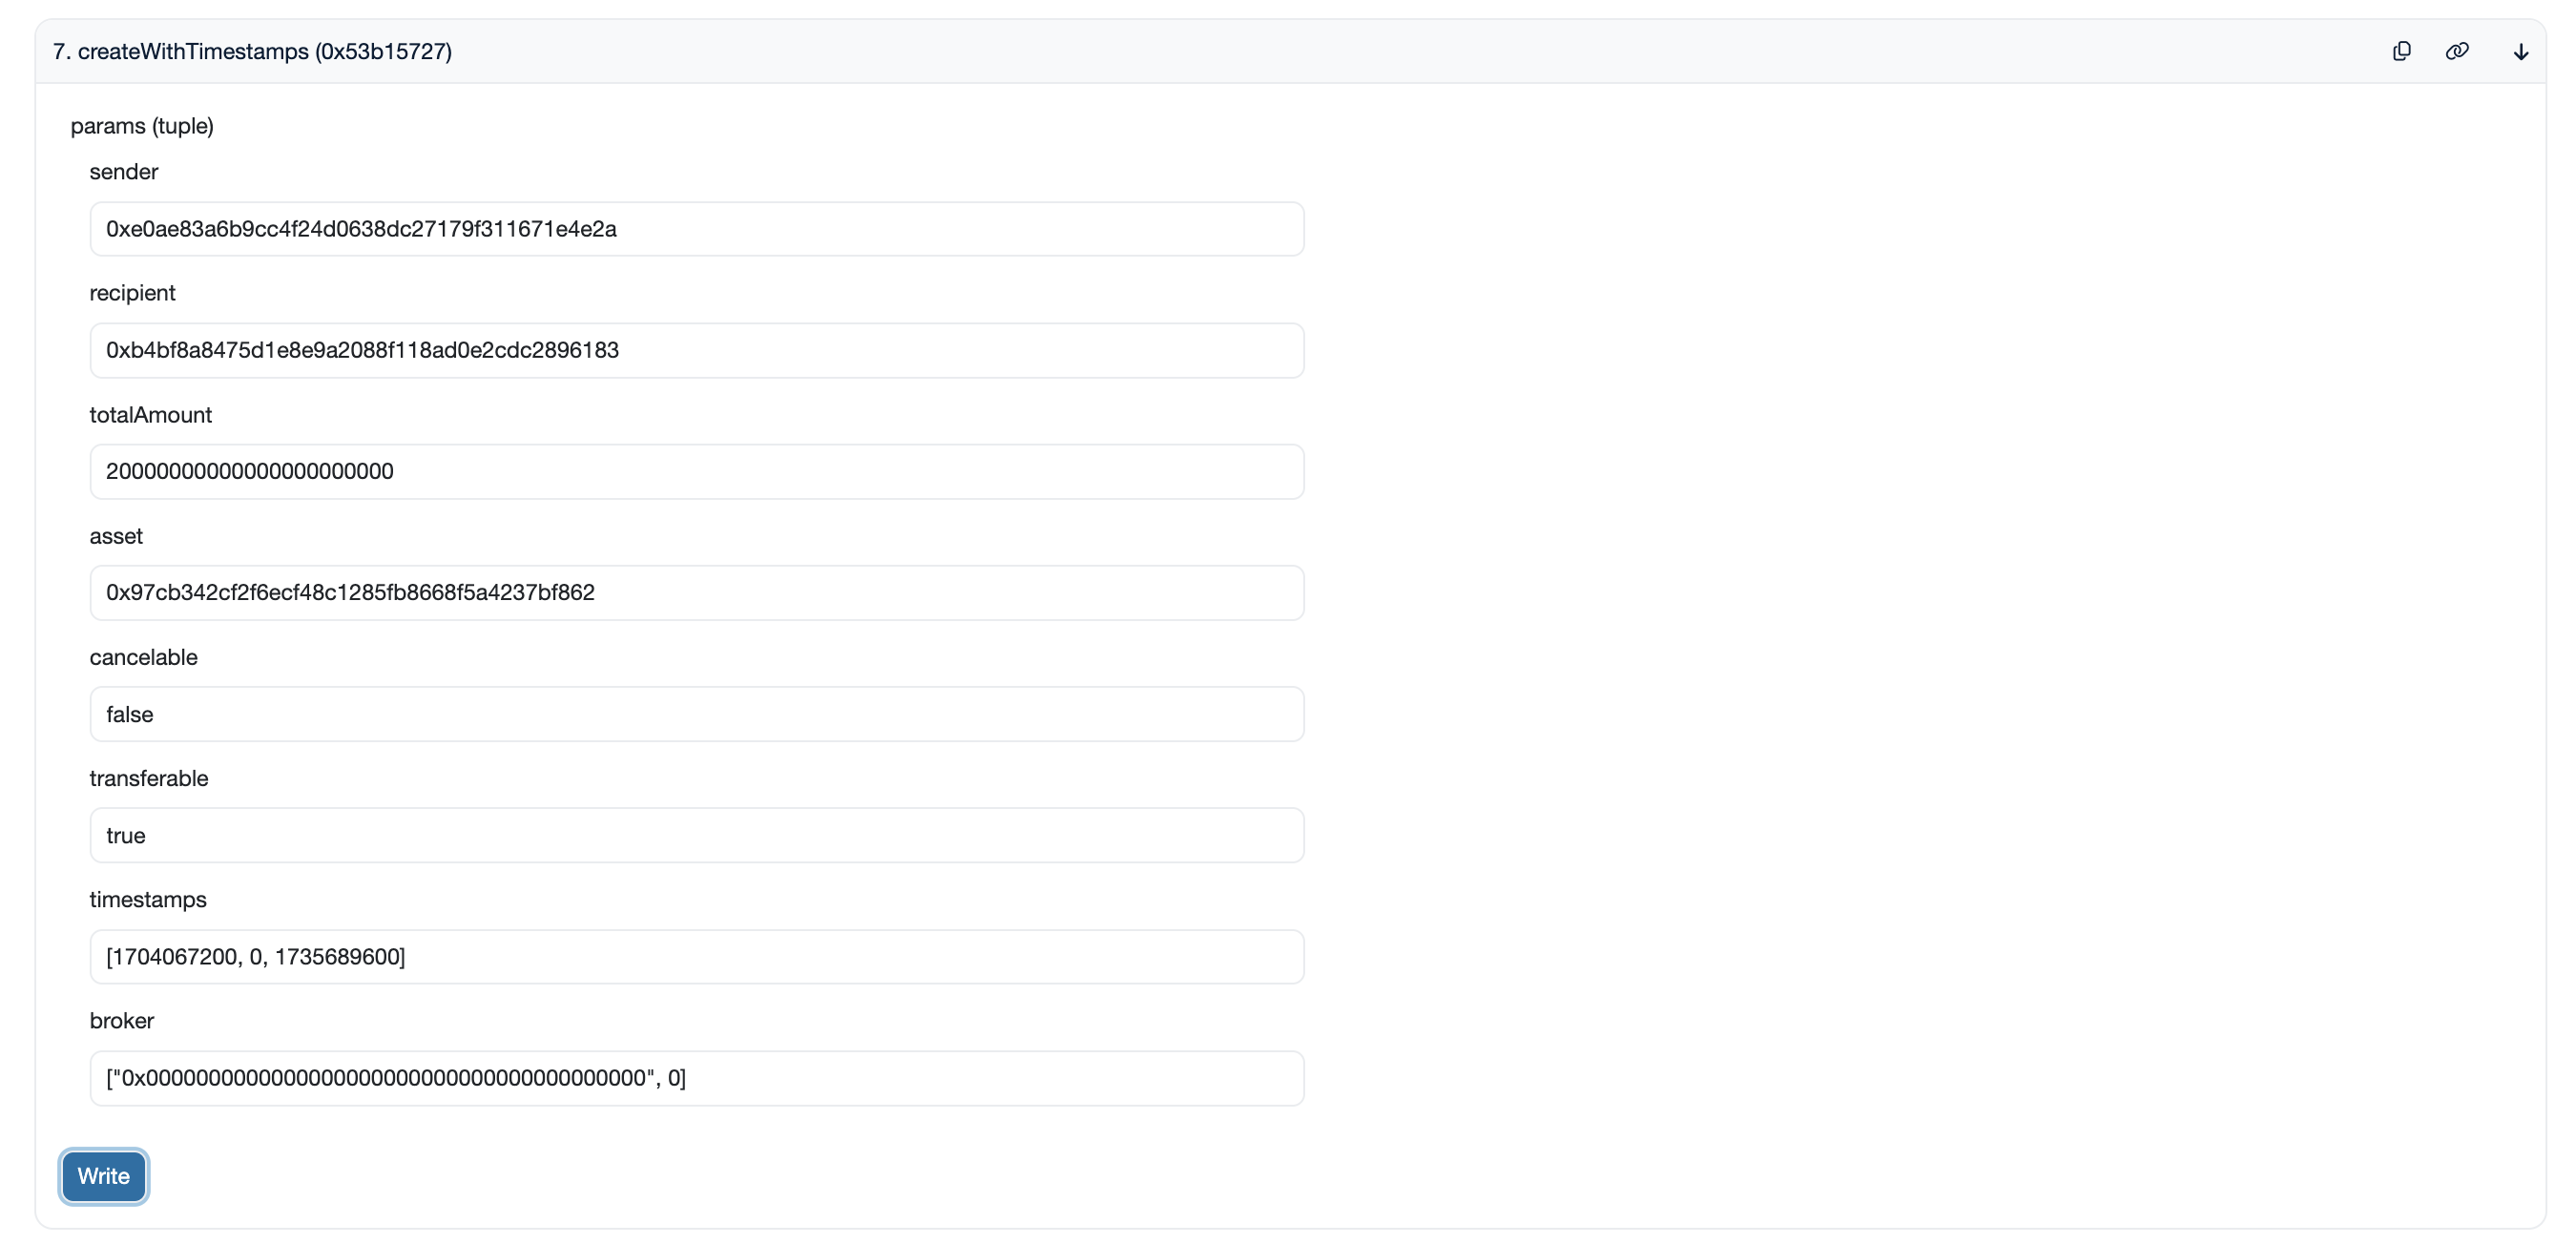
{
  "sender": "0xe0ae83a6b9cc4f24d0638dc27179f311671e4e2a",
  "recipient": "0xb4bf8a8475d1e8e9a2088f118ad0e2cdc2896183",
  "totalAmount": 20000000000000000000000,
  "asset": "0x97cb342cf2f6ecf48c1285fb8668f5a4237bf862",
  "cancelable": false,
  "transferable": true,
  "timestamps": [1704067200, 0, 1735689600],
  "broker": ["0x0000000000000000000000000000000000000000", 0]
}
If the Etherscan UI does not break down the inputs into separate fields (like in the screenshot above), you will have to provide it like this:
[
  "0xe0ae83a6b9cc4f24d0638dc27179f311671e4e2a",
  "0xb4bf8a8475d1e8e9a2088f118ad0e2cdc2896183",
  "20000000000000000000000",
  "0x97cb342cf2f6ecf48c1285fb8668f5a4237bf862",
  false,
  true,
  [1704067200, 0, 1735689600],
  ["0x0000000000000000000000000000000000000000", 0]
]
In case of a tuple, ensure to follow the best practices:
- Use square brackets
- Wrap addresses in double quotes
- Wrap large numbers in quotes
Follow this guide from Etherscan to learn how to correctly format input data for Write Contract tab.
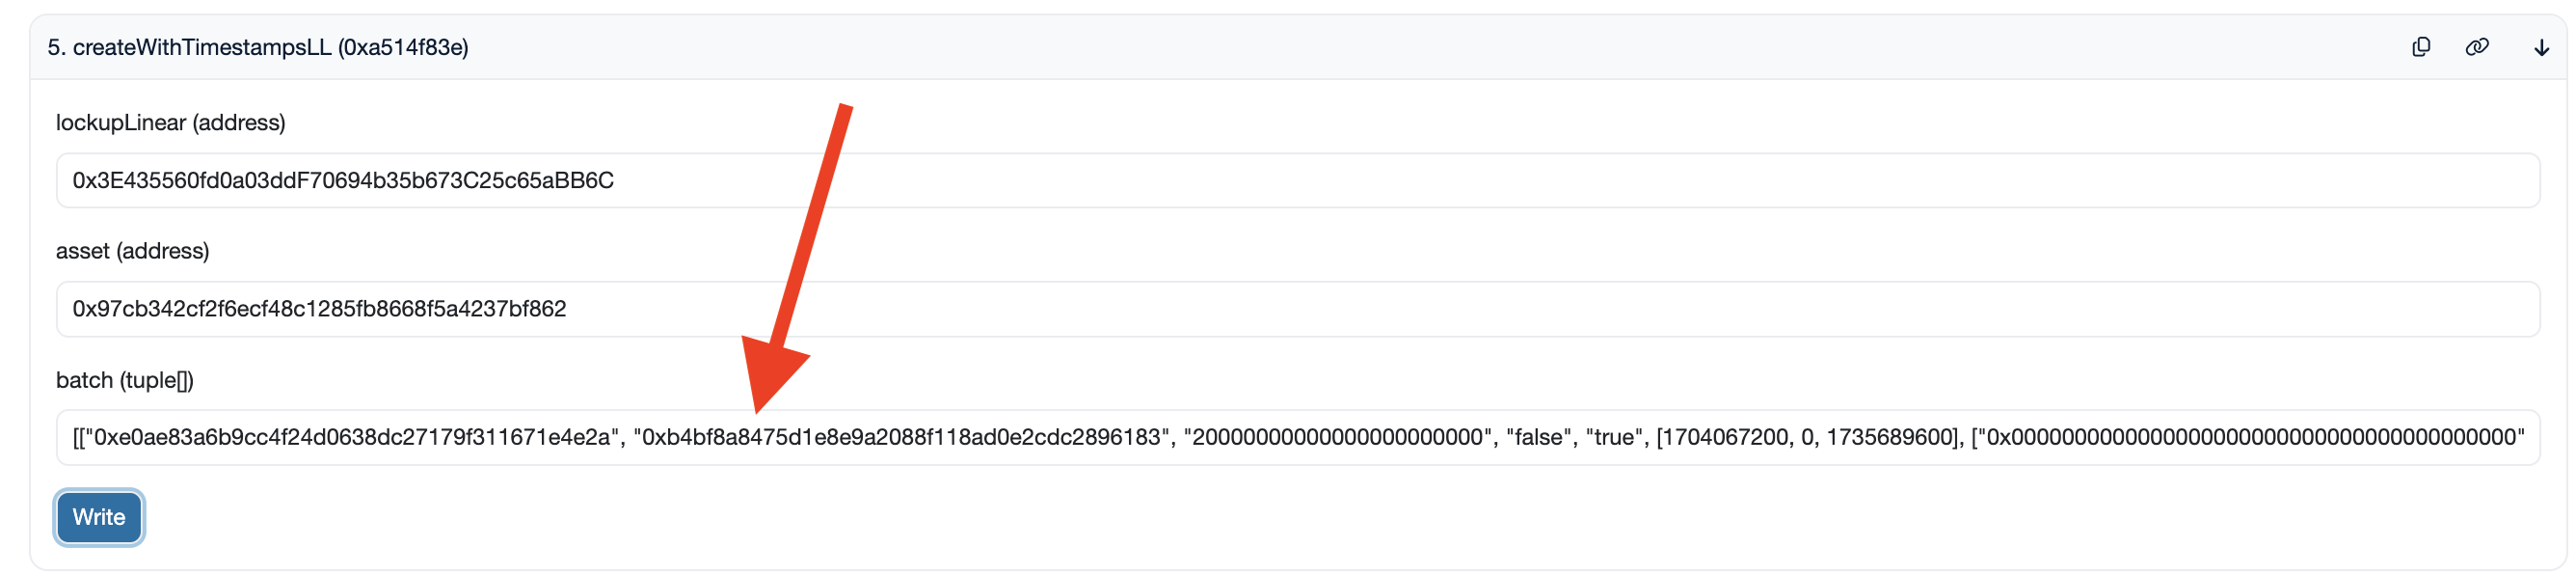
As an example, in the screenshot below, we are providing input parameters for
createWithTimestampsLL
function in
SablierV2BatchLockup
contract. As you can see, since batch requires a tuple and does not break it down into separate fields, we had to use
the above method.
Sender
If the stream is cancelable, the sender is the wallet that will have the ability to cancel and renounce the stream. But if the stream is non-cancelable, the sender cannot cancel the stream.
Most users will set their own wallet address as the sender.
Recipient
The address you want to stream tokens to. The owner of this address is the stream recipient and will receive tokens on withdraw.
Total Amount
This is the total amount of assets available to be streamed, DECIMALS INCLUDED. If the asset has 18 decimals, for
example, you will need to add eighteen zeros after the amount. Let's say you want to stream 20,000 DAI like in this
example, you will need to fill in 20000000000000000000000.
The total amount will also include any broker fee. While fees are kept at zero in Sablier UI, the total amount should be equal to the streamed amount plus the broker fee amount.
Asset
The asset is the contract address of the ERC-20 token being streamed. You can obtain this from the Sablier Interface or from any other Etherscan explorer. Please double check the token address is correct before continuing.
Cancelable
This field indicates whether or not you want the stream to be cancelable. This can be set to either true or false.
If set to true, the stream will be cancelable.
You can make a cancelable stream non-cancelable after the stream has been created, but if it's a non-cancelable stream, it cannot become cancelable post-creation.
Transferable
The transferable field indicates whether the NFT owner is allowed to transfer te NFT or not. This can be set to either
true or false.
This flag cannot be changed later.
Timestamps
The timestamps field contains the start time, cliff time, and the end time of the stream, in this order. The values
should be UNIX timestamps (represented in seconds). You can find a Unix timestamp converter
here.
If you prefer to not have a cliff, you can simply set the cliff time to 0, like in this example. If, however, you want to have a cliff, fill in the timestamp for the the cliff there.
| Total Duration | Cliff Duration | [Start, Cliff, End] |
|---|---|---|
| 1 year | no cliff | [1704067200, 0, 1735689600] |
| 1 year | 1 day | [1704067200, 1704153600, 1735689600] |
Broker
An optional parameter that can be set in order to charge a fee as a percentage of totalAmount.
You can set the broker field to address zero and zero fees. Read more about fees
here.
Inside tuples/arrays (the [ ... ] structures in the example) make sure that you:
- Use square brackets
- Wrap addresses in double quotes, i.e.
" "
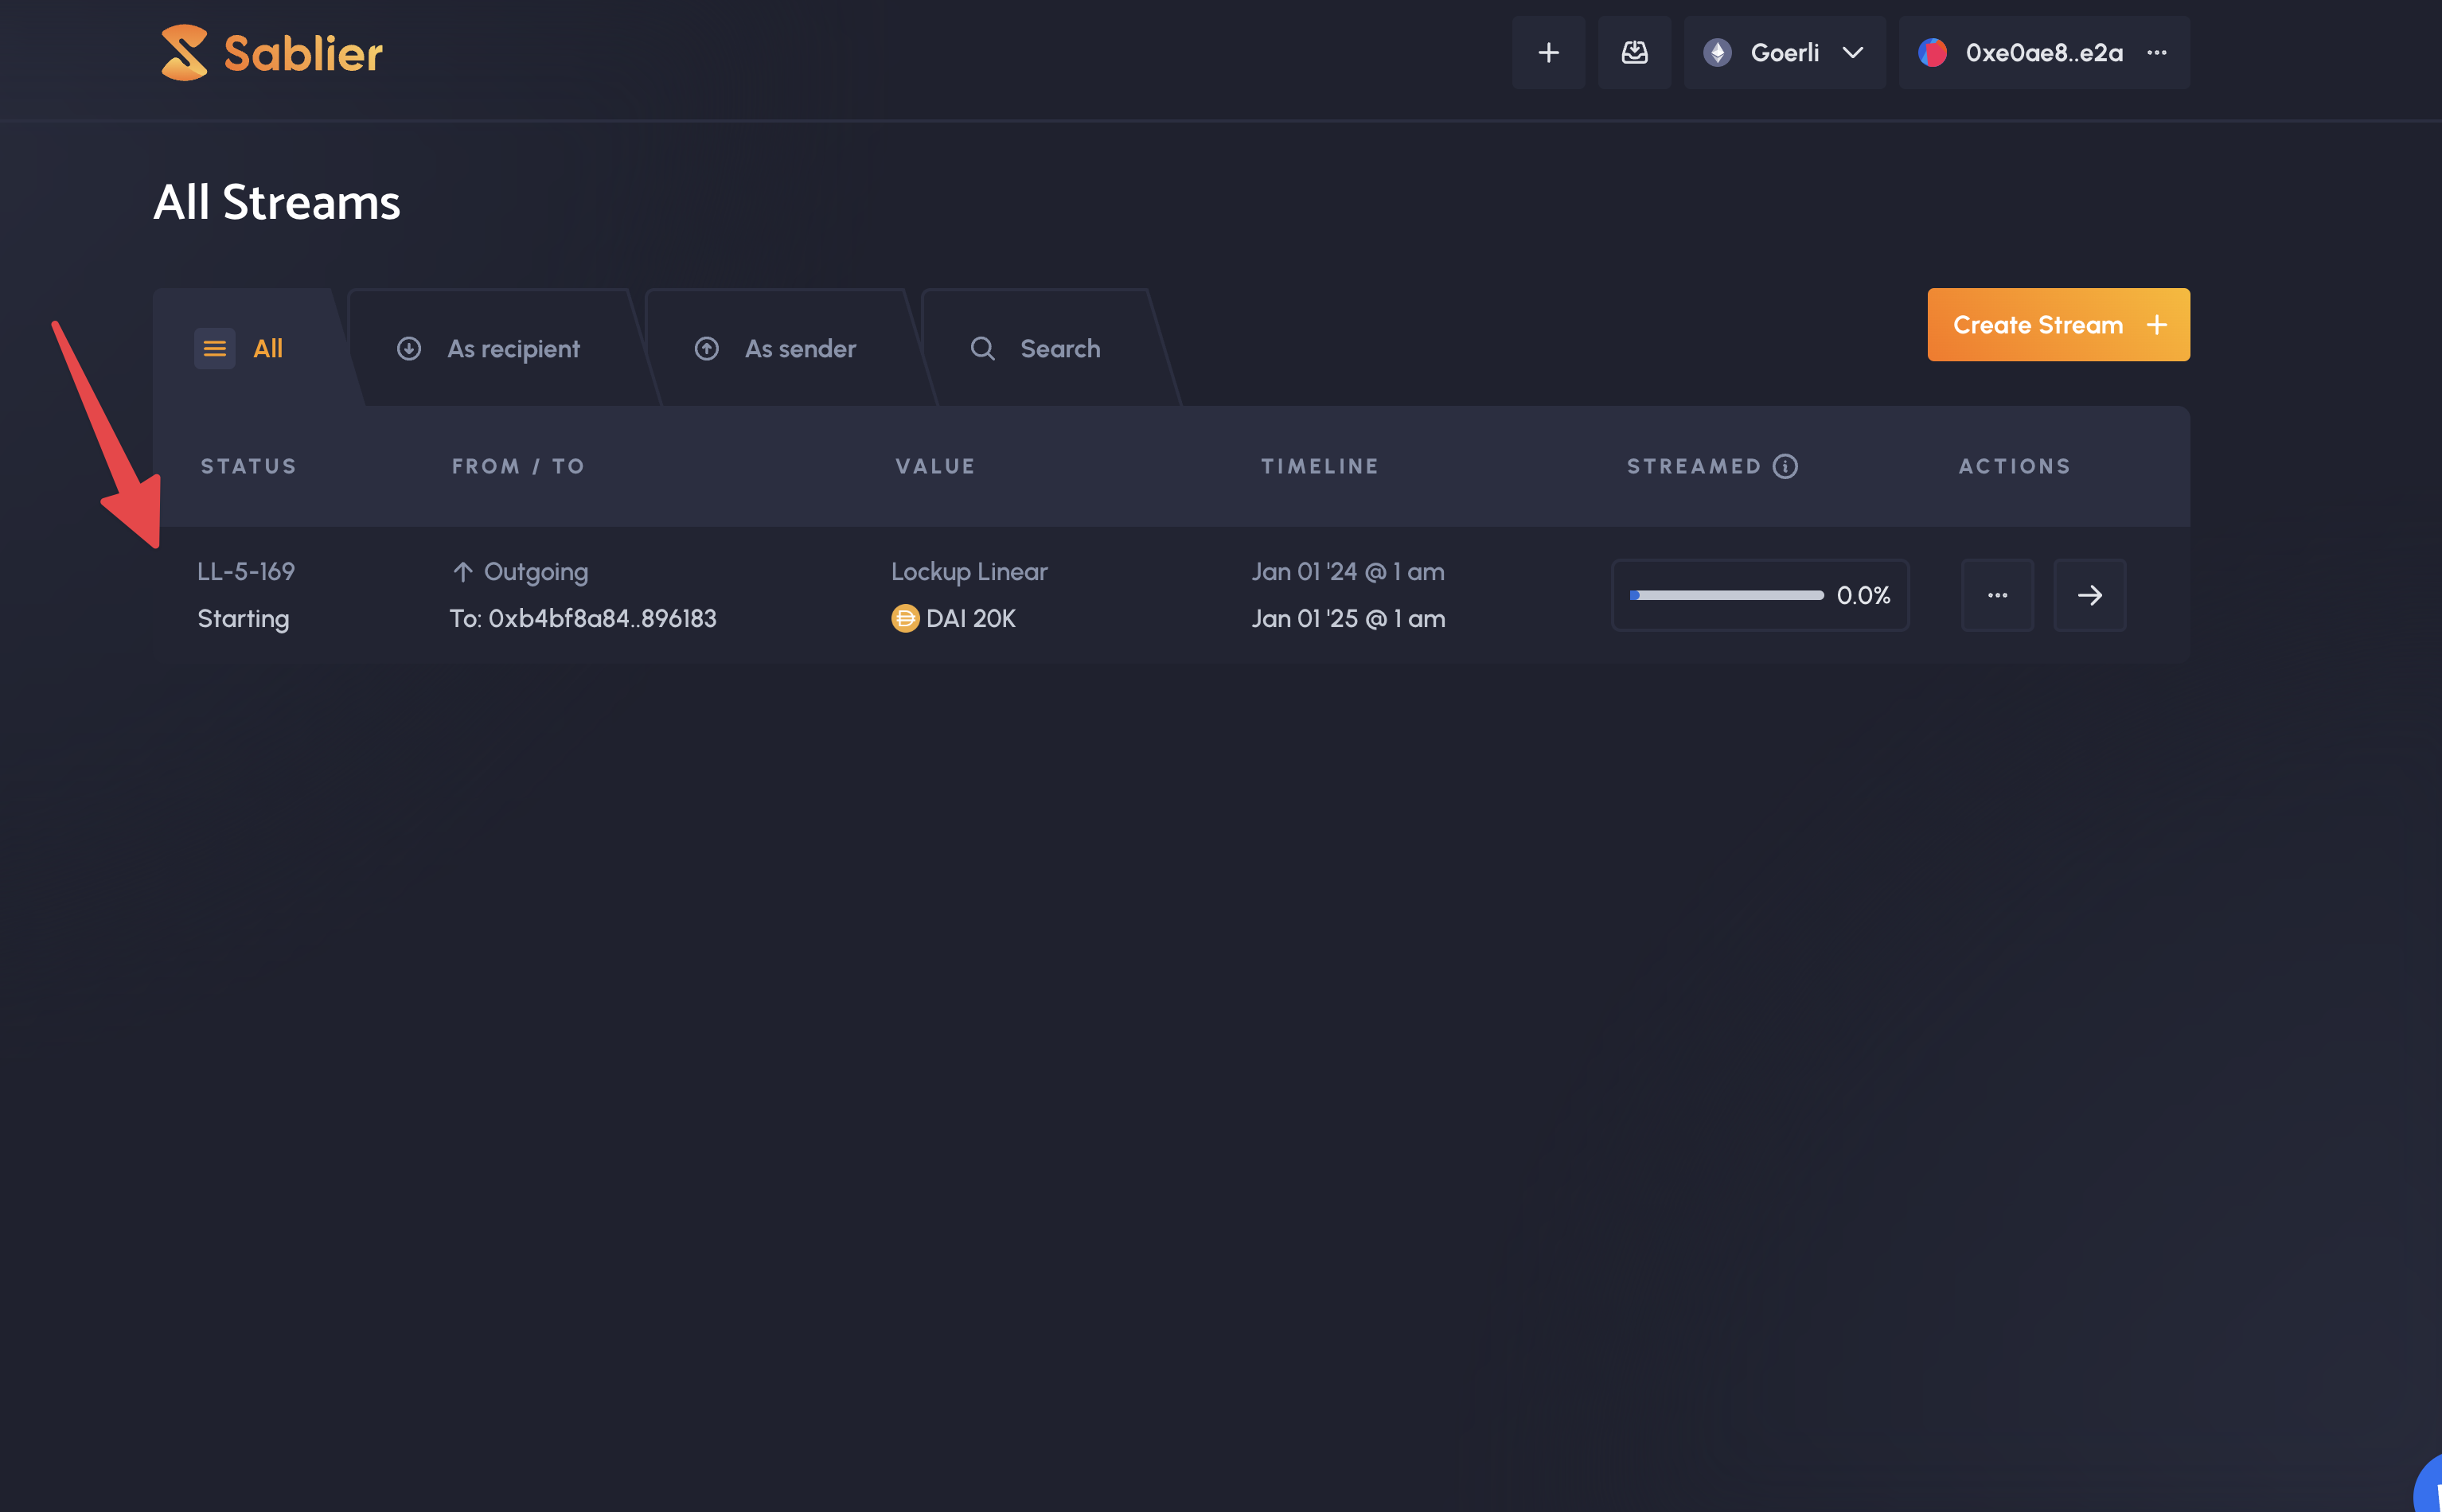
Once the data is filled, and after you double-checked, click on the "Write" button and confirm the transaction in your wallet. That's all! You are done. You can now head over to the Sablier Interface, connect your wallet, and your stream should appear like this:
How about createWithDurations?
For the durations version, we'll replace the timestamps parameter with durations to represent the total duration of
the stream (in seconds) and the duration of the cliff (in seconds).
{
  "durations": [0, 864000] // no cliff and a total duration of 10 days
}
| Total Duration | Cliff Duration | [Cliff, Total] |
|---|---|---|
| 10 days | no cliff | [0, 864000] |
| 10 days | 1 day | [86400, 864000] |
Withdrawing from a Stream
Prerequisites
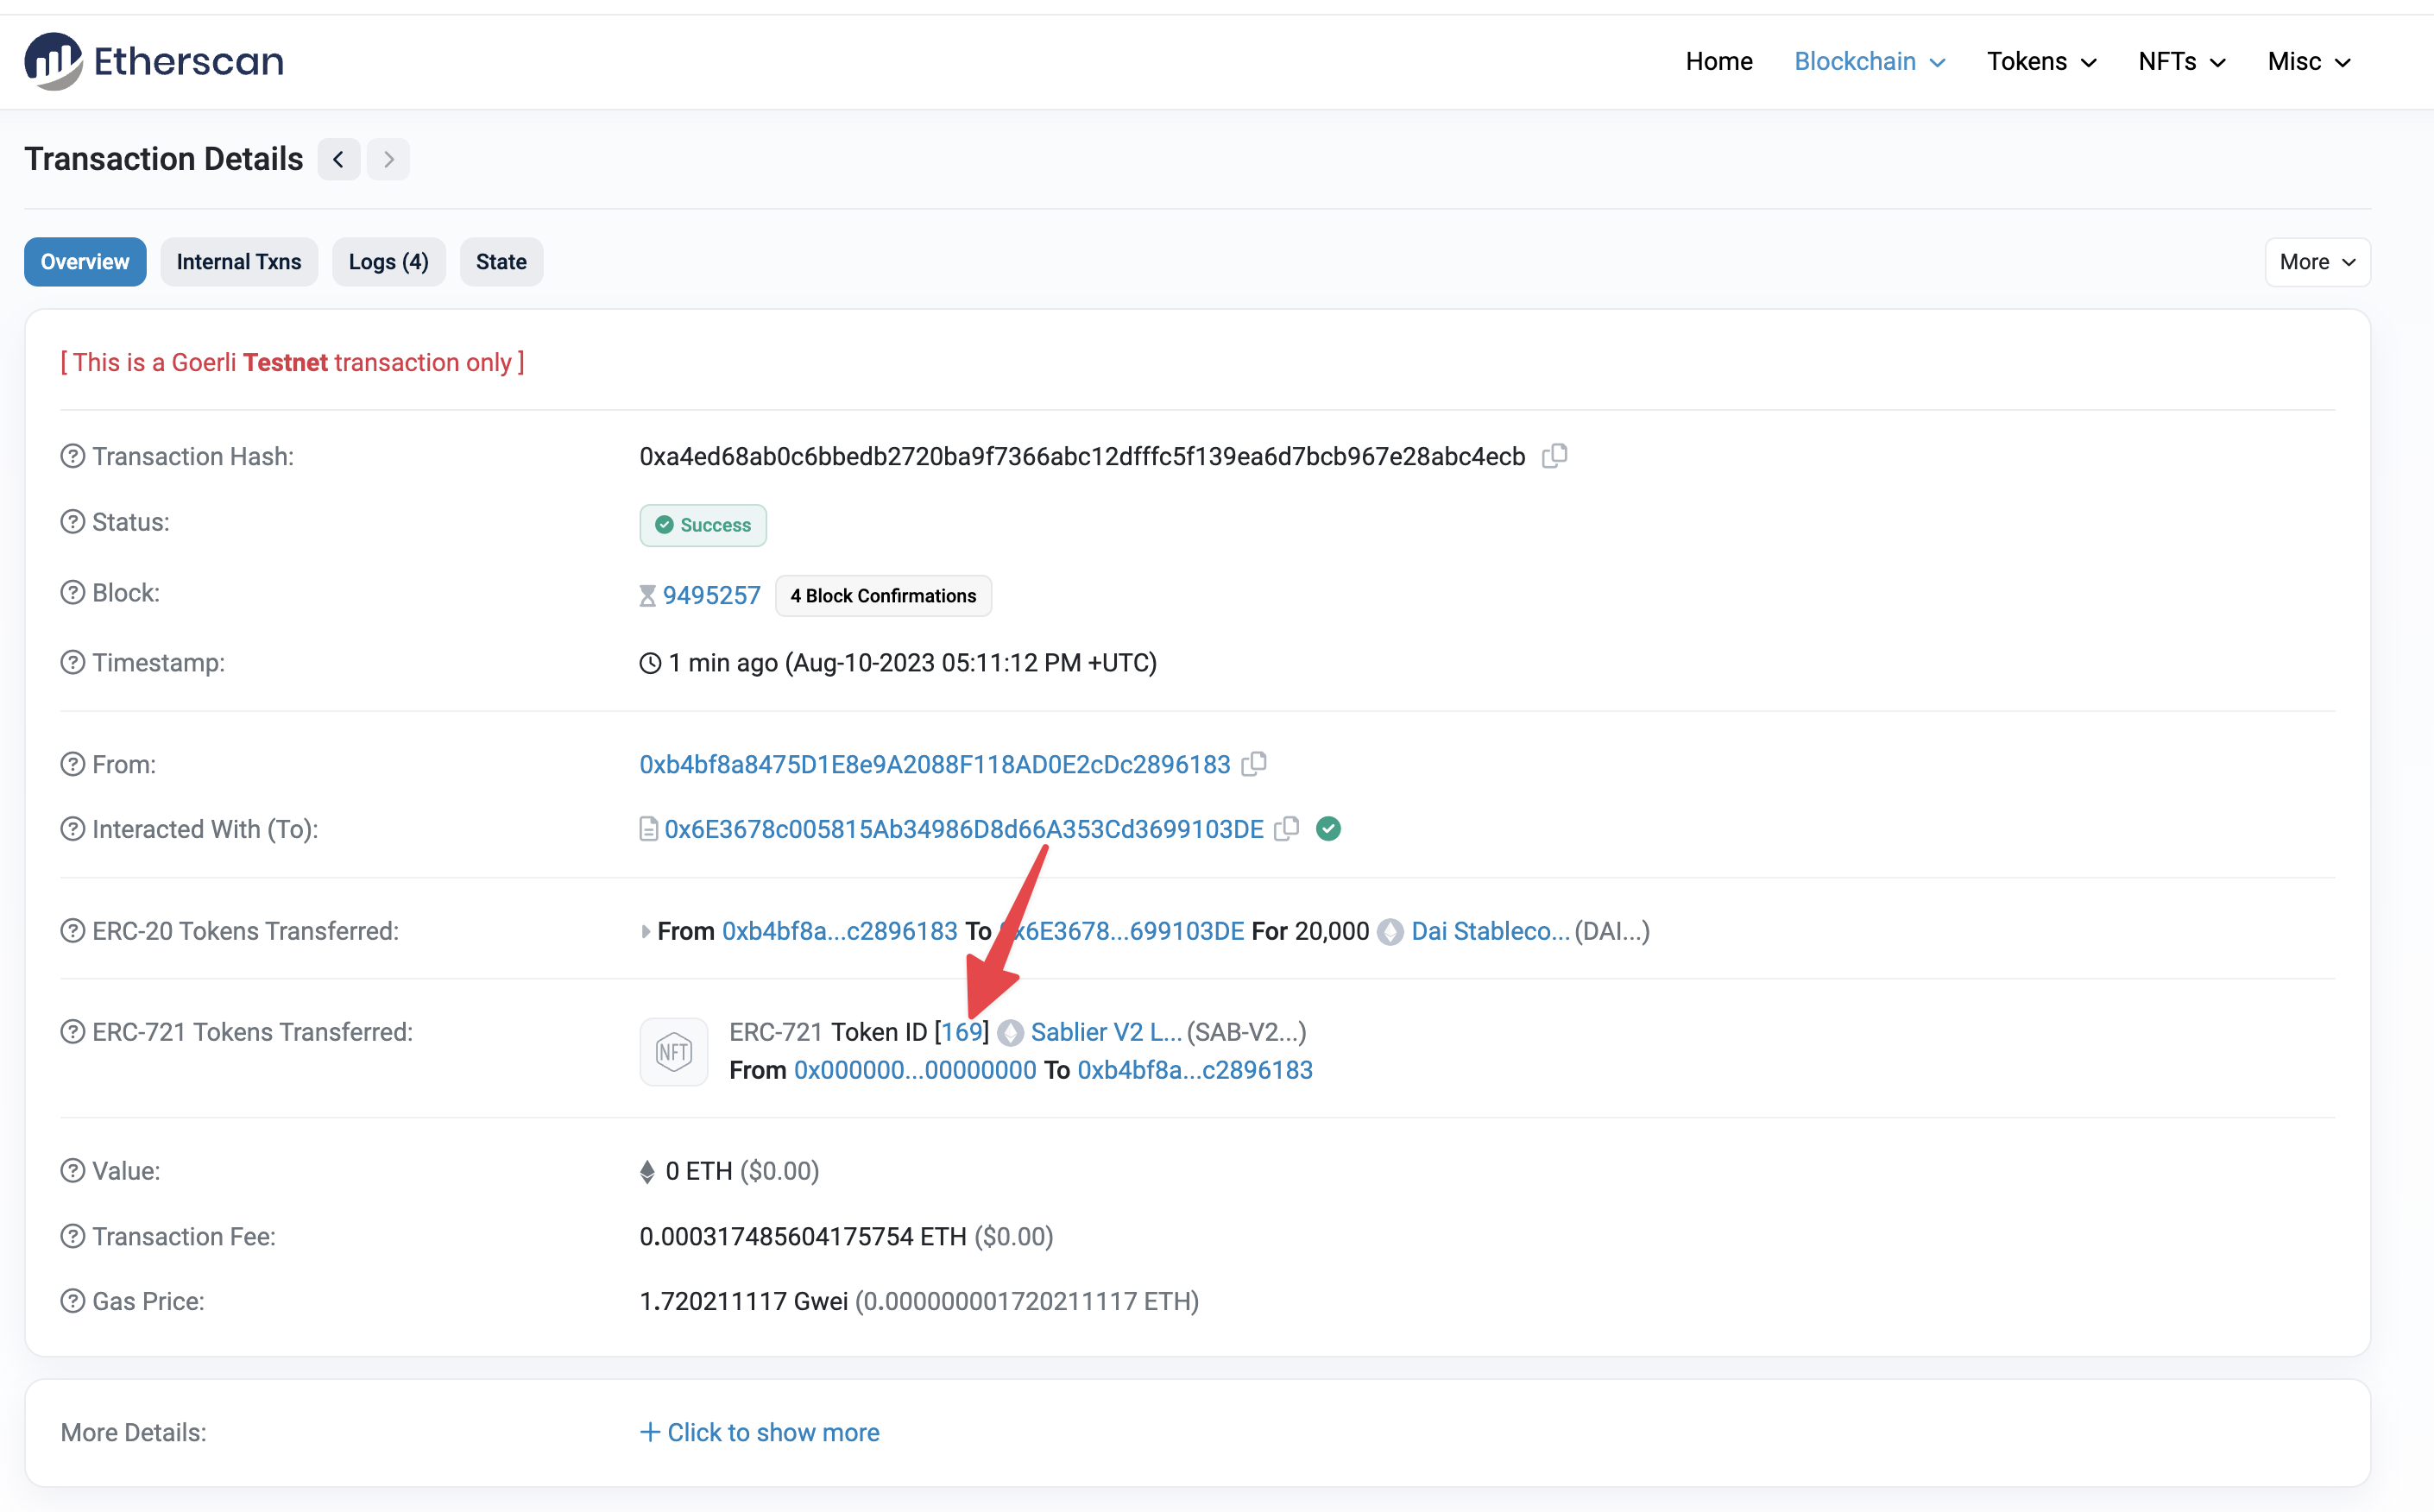
To withdraw from a stream using Etherscan, you will need to obtain the stream's ID. To obtain this without the Sablier Interface, find the transaction which created the stream on Etherscan. Here's an example of what it should look like.
Once found, you will see the stream ID between the two brackets. Note that stream ID and "Token ID" are the same thing.
Anyone can withdraw on your behalf if they pay the gas fee. When a third party withdraws, the recipient is the only allowed withdrawal address. However, if you withdraw yourself, you can choose to withdraw to any other address. You can read more about this advanced feature here.
Step 1: Go to contract page
Head over to our deployments list and select the contract address you want to interact with.
Once you find the right contract, click on the address to access its explorer's page. Click on the "Contract" tab, and then on the "Write Contract" sub-tab.
You can now connect your wallet to the interface by clicking on "Connect to Web3".
Step 2: Fill in parameters
Head over to the withdraw method, and fill in the data.

{
  "streamId": 169,
  "to": "0xb4bf8a8475d1e8e9a2088f118ad0e2cdc2896183",
  "amount": 100000000000000000000
}
Stream ID
The streamId is the value you have previously located in the transaction in which the stream was created.
To
The to field is there for the stream recipient's address. This will most likely be your own wallet, but you can also
choose to withdraw these funds to another wallet (e.g. a separate cold wallet) if you are the stream's recipient. If you
are not the stream recipient, it MUST be the address of the recipient.
Amount
This represents the amount of tokens that you want to withdraw, DECIMALS INCLUDED. For example, if the token you are
looking to withdraw has 18 decimals, you will need to add eighteen zeros after the amount. Let's say you want to
withdraw 100 DAI like in this example, you will need to put in 100000000000000000000. Oh, and make sure that that
amount has already been streamed, you cannot withdraw funds that haven't yet been streamed over to you.
Once ready, click on the "Write" button, and confirm the transaction in your wallet. You are done!
Apart from the main flows, you may be required to do some other actions, usually listed as prerequisites.
Prerequisite: ERC20 Allowances
Before interacting directly with the Sablier V2 contracts to create a stream you will need to manually grant proper ERC20 allowances.
Step 1: Go to token page
Pick a token you want to stream, e.g.
DAI. Using its address, visit the token
page on Etherscan (in this example, we're using Sepolia): https://sepolia.etherscan.io/token/<INSERT-TOKEN-ADDRESS>
To get the address of an asset in the Sablier Interface, you can click on its name in the token list dialog or find an existing stream with that token and click on the icon inside the stream circle.


Step 2: Go to approve
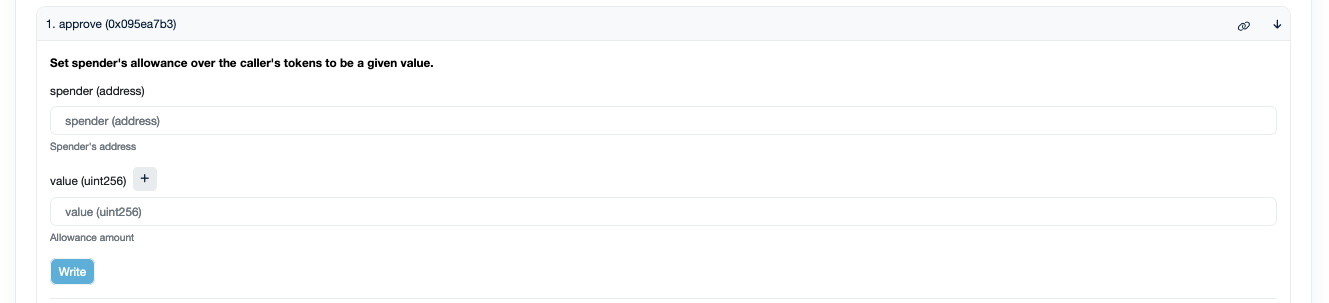
Next, look for the "Contract" tab and the "Write Contract" sub-tab.
You'll see a list of methods that can be called for that token. Pick the approve method (e.g.
DAI's approve). Most
ERC-20 approve methods will contain two fields:
- The spender
- The amount
Step 3: Send transaction
For the purpose of creating a LockupLinear stream with Sablier V2, the spender will be the SablierV2LockupLinear contract.
As for the amount, you'll have to pad it with the right number of decimals. For DAI, that's 18 decimals, so a value of
100 will turn into 100 * 1e18 (100 followed by 18 zeroes). For USDC,that's 6 decimals, so a value of 100 will turn
into 100 * 1e8 (100 followed by 8 zeroes). The same logic applies to the total amounts when creating
the stream.
{
  "spender": "0x3E435560fd0a03ddF70694b35b673C25c65aBB6C",
  "amount": 100000000000000000000
}
Before clicking on the "Write" button to submit your allowance update, make sure to connect your wallet to the interface by clicking on "Connect to Web3".